This article explains how to add a rule and what the conditions option does and how to create a condition.
When the user clicks on the Add rule (wizard) button, you will see a popup page to fill in the Name of the rule, Description, Conditions Any / All.

What does the Conditions option do?
After adding the Name and description, you select any condition option and click on the small plus icon. You will then find two icons, one for  questionnaire and the other one for the
 Database.
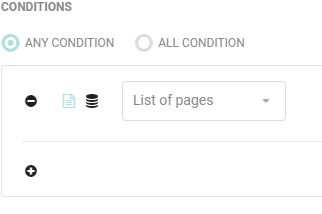
If a rule is to be added in a questionnaire, just click on the questionnaire icon and you will see a column with list of pages from which you can make a selection.

When you click on the Database icon you will see a column name text box and when you select the appropriate question page, a condition column appears with various options like IS/ IS NOT/ IS ANY OF/ IS AFTER/ IS BEFORE/ IS BETWEEN.
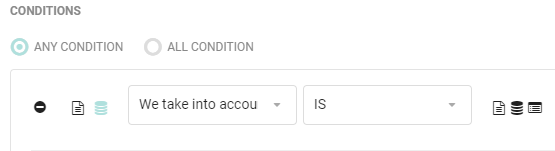
You can choose one option based on the question for which you are creating the rule and the next step would be selecting one option among the three tiny icons which appears (Questionnaire, Database, Constant)
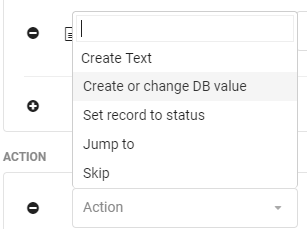
Clicking on the tiny plus icon under Action, you will see a column with various options like (Create text/ create or change DB value/Set record to status/ Jump to, Skip)
So, by adding rules this way, every answer option is linked with either a text/value/ status/ page.